



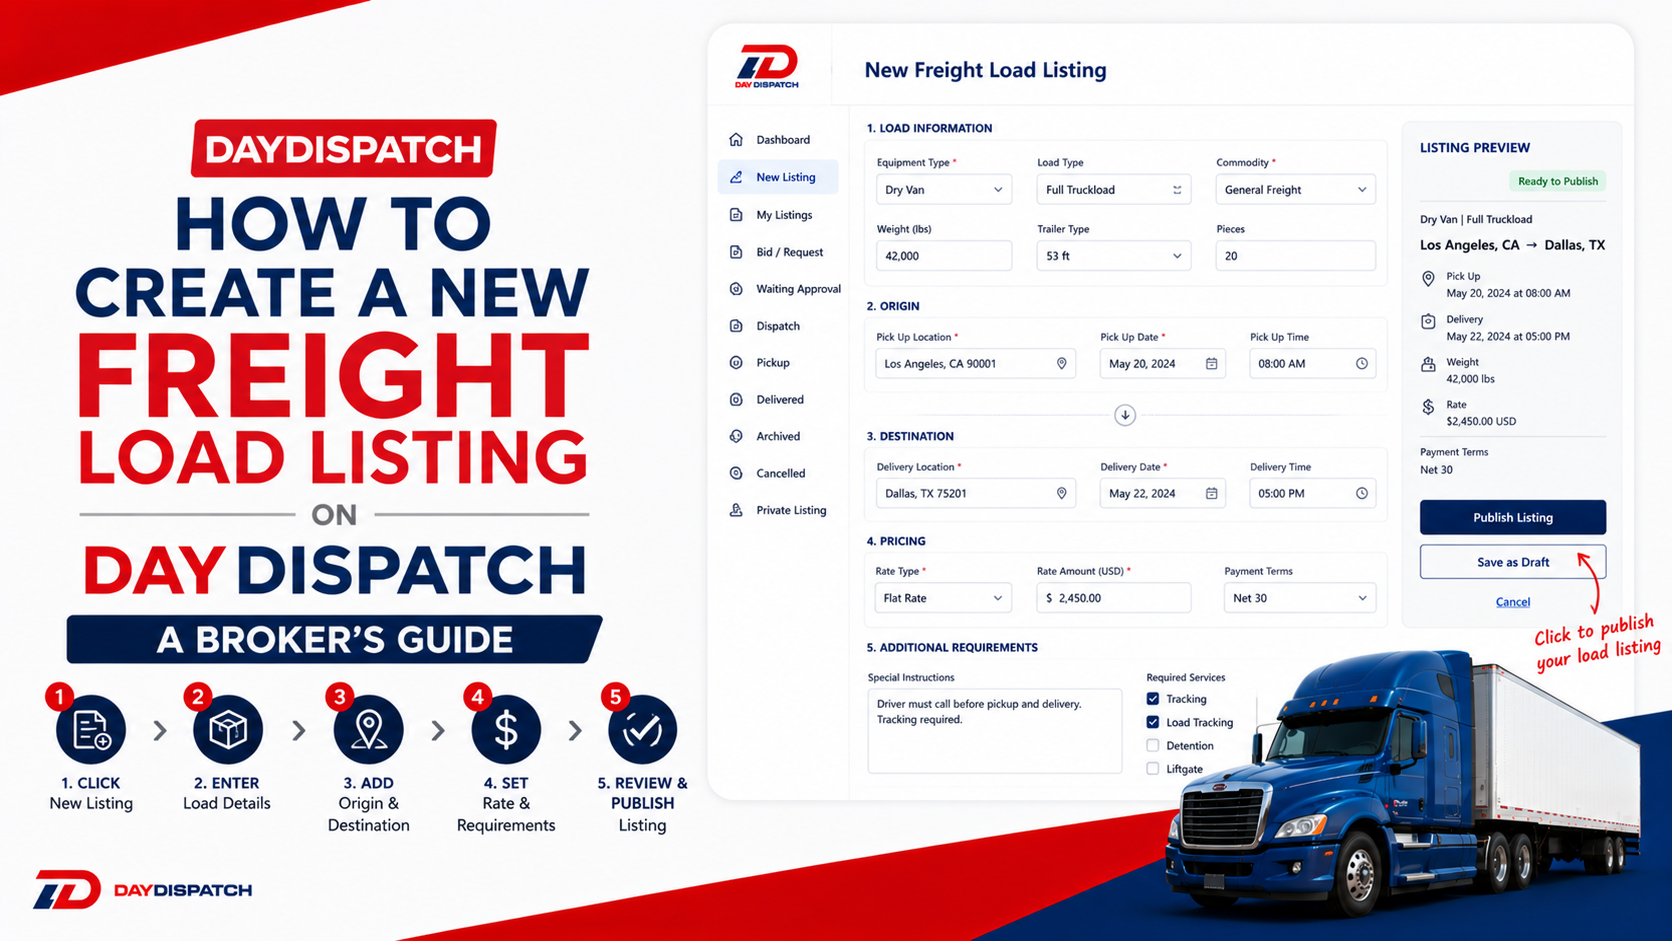
How to Create a New Freight Load Listing on DayDispatch — A Broker's Guide
Learn how to create a new freight load listing on DayDispatch as a broker. Add shipment details, pickup and delivery locations, pricing information, and load requirements to connect with carriers and manage freight transportation efficiently.
Introduction
If you are a broker on DayDispatch, posting a freight load listing is how you connect your cargo shipment with the right carrier. Whether you are moving palletized goods, temperature-sensitive products, oversized freight, or hazardous materials, the Post Freight Load form gives you the tools to describe your shipment in full detail. This guide walks you through every section of the form clearly and in order, so your freight listing goes live correctly the first time.
Step 1: Log In and Navigate to the Broker Dashboard
Once you log into your DayDispatch account, you will land on your main dashboard. From the top navigation bar, locate the Move Shipment section and click on it. You will see the Broker dropdown which contains all your listing tabs including New Listing, My Listings, Bid/Request, Waiting Approval, Dispatch, Pickup, Delivered, Archived, Cancelled, and Private Listing.
Click on the New Listing tab. This is your starting point for all new shipments.

Step 2: Choose Post Freight Load
Inside the New Listing tab, you will see three options at the top. Post Vehicle is for standard road vehicles. Post Heavy Vehicle is for heavy equipment and machinery. Post Freight Load is for cargo and freight shipments of all kinds.
Since you are creating a freight listing, click on Post Freight Load.

Step 3: Fill In the Freight Details
This is the core section of your listing. It describes the physical characteristics of your shipment and the equipment required to carry it.
- Select Unit is the first choice you need to make. Choose either Inches or Feet depending on how you want to enter the dimensions of your freight. Make sure you stay consistent with the unit you choose across all dimension fields.
- Length is the longest measurement of your freight. Enter the numeric value based on the unit you selected above.
- Width is the measurement from side to side. Enter this carefully especially if your freight is close to or exceeds the standard trailer width, as this may require special permits.
- Height is the vertical measurement of your freight. If your freight exceeds standard height limits for the states on your route, the carrier will need to plan accordingly.
- Weight is the total weight of the shipment in pounds. Enter the accurate gross weight including any packaging or pallets. If your shipment exceeds 80,000 pounds, it will likely require an overweight permit depending on the states on the route.
- Freight Class is the classification assigned to your freight based on its density, stowability, handling, and liability. Standard freight classes range from 50 to 500. If you are unsure of the class, consult the NMFC guidelines or your freight broker manual. Entering the wrong class can affect pricing and carrier acceptance.
- Load Type is a dropdown where you select how much of the trailer your freight occupies. STL stands for Small Truck Load and is used for smaller shipments that do not require a full trailer. LTL stands for Less Than Truck Load and is used when your freight shares trailer space with other shipments. FTL stands for Full Truck Load and means your freight takes up the entire trailer.
- Trailer Specification allows you to select all the equipment features the carrier's trailer must have for this shipment. You can select multiple options. Common selections include Air Ride if your freight is fragile and needs suspension protection, Temp Control if the freight requires a climate-controlled environment, Lift Gate if the origin or destination does not have a loading dock, Tarp if the freight needs weather protection on an open trailer, Hazmat if the shipment contains regulated materials, and Team Driver if the delivery timeline requires continuous driving. Select every specification that applies to your shipment so only qualified carriers respond.
- Trailer Type is where you select the type of trailer required. Your options include VAN, REEFER, FLATBED, STEP OR DROP DECK, REMOVABLE GOOSENECK (RGN), CONESTOGA, CONTAINER / DRAYAGE, STRAIGHT TRUCK / BOX TRUCK / SPRINTER, HAZMAT, POWER ONLY, HOT SHOT, LOWBOY, ENDUMP, LANDOLL, PARTIAL, 20ft container, 48ft container, and 53ft container. Choose the trailer type that matches the nature of your freight. For example, use REEFER for temperature-sensitive goods, FLATBED for machinery or construction materials, and VAN for standard palletized cargo.
- Temperature Request appears if your shipment requires climate control. Select the appropriate temperature range for your cargo. This is critical for food, pharmaceuticals, and other perishable or temperature-sensitive goods. Make sure you select the right range as the wrong temperature setting can result in cargo rejection at the destination.
- Specify Number of Units or Pallets is where you enter how many individual units or pallets make up your shipment. This helps carriers plan their load configuration and space allocation.
- Hazmat is a checkbox that you must select if any part of your shipment is classified as hazardous material. If you select this option, make sure you have also selected Hazmat under Trailer Specification and that your carrier is certified to handle hazardous cargo. You will also need to provide the UN number and hazmat class details in the Special Instructions field.

Step 4: Set Your Shipping Preferences
This section allows you to specify any additional pickup and delivery services your shipment requires. These preferences help carriers understand the full scope of the job before they bid.
Under Pickup Services, select Team Drive if the trip requires two drivers due to distance or time constraints. Select Inside Pickup if the carrier needs to enter the facility to collect the freight rather than loading from a dock. Select Lift Gate Service if the origin location has no loading dock and the freight needs to be lowered from the truck. Select Residential if the pickup is at a home or non-commercial address. Select Single Shipment if this load must not be combined with any other freight on the same truck. Select Sorting and Segregation if the freight needs to be organized before loading.
Under Delivery Services, select Appointment if the destination requires a scheduled delivery window. Select Notification Prior Delivery if the receiving party must be called or messaged before the carrier arrives. Select Lift Gate Service if the destination also lacks a dock. Select After Business Hours Delivery if the delivery needs to happen outside of standard business hours. Select Residential if the destination is a home address. Select In Bond Freight if the shipment is moving under customs bond. Select Mine, Government, or Airport if the destination is a controlled or secured facility that requires advance clearance.
Only select the services that genuinely apply to your shipment. Selecting unnecessary services may limit the number of carriers who respond to your listing.

Step 5: Enter the Origin Location
This is where your freight is currently located and needs to be picked up from.
- First select the facility type. Choose Terminal if the freight is at a logistics terminal, Dealer if it is at a commercial facility, or Auction if it is at an auction house.
- Enter the Company or Facility Name so the carrier knows exactly where to go.
- Enter the Email Address of the origin contact so the carrier can communicate directly with the pickup point if needed.
- Enter the Buyer Number if applicable. This is relevant for auction or dealer pickups where a reference number is required for release of the freight.
- Enter the Phone Number of the primary contact at the origin. Make sure this number is reachable during the pickup window you define later.
- Fill in the Address and Address 2 if there is a specific dock number, gate, or building reference that the carrier needs to find the correct location.
- Select the State, enter the City, and enter the Zip Code. All three of these fields are required. An incorrect or incomplete origin address is one of the most common reasons a pickup fails, so verify this information carefully before posting.
Step 6: Enter the Destination Location
This section is identical in structure to the Origin Location but refers to where your freight needs to be delivered.
Follow the same steps as above for the destination. Make sure the receiving contact's phone number is accurate and reachable during the delivery window. If the destination is a secured facility such as a government site, airport, or mine, note the entry requirements clearly in the Special Instructions field later. A wrong address or missing contact at the destination can result in a failed delivery, a re-delivery fee, or cargo being turned away.
Step 7: Set Your Pickup and Delivery Dates
In the Date and Time section, you define the timeline for your shipment.
- For Pickup Date, select whether the pickup should happen Before, On, or After a specific date. Before means the carrier must collect the freight no later than that date. On means the pickup must occur on exactly that date. After means the carrier can pick up any time after that date.
- For Delivery Date, the same Before, On, and After options apply. This tells the carrier your expected delivery window at the destination.
- Pickup From and Pickup To let you set a time window during which the carrier is expected to arrive at the origin for loading. For example, 7:00 AM to 11:00 AM.
- Delivery From and Delivery To work the same way for the destination end. If your destination requires an appointment, make sure the delivery window matches your scheduled appointment time.
- Always ensure your pickup date is before your delivery date. For freight shipments especially, factor in realistic transit time based on the distance between origin and destination.

Step 8: Set Up Carrier Payment
This section defines the financial terms of the job for the carrier.
- Book Price is the total agreed amount for transporting this freight.
- Deposit Amount is the upfront payment collected before the job begins. Enter the amount you are requiring as a deposit.
- Pay To Carrier is a required field. This is the amount the carrier will actually receive for completing the job. Make sure this value is filled in before you submit the listing.
- COD/COP Amount stands for Cash on Delivery or Cash on Pickup. This is the amount the carrier is expected to collect at the time of pickup or delivery. Enter this accurately as it directly affects how the carrier manages the financial handoff.
- Balance Amount is the remaining amount after the deposit is applied. Always verify that this figure is correct before posting.
Step 9: Fill In Additional Information
Order ID is a required field. Enter your internal reference number or order identifier for this freight shipment. This ID will follow the listing across all tabs in your Broker Index from My Listings through to Delivered, so make it consistent with your internal records.
Upload Freight Documents by clicking Choose Files. You can upload images, PDF files, and Word documents. Having documents attached to the listing helps carriers prepare properly and avoids delays at pickup.
Additional Terms is where you enter any contractual conditions specific to this shipment. For example, you may want to state that the carrier is responsible for any temperature deviation, or that the carrier must provide proof of insurance before dispatch.
Special Instructions is for anything the carrier needs to know that does not fit in the fields above. Common examples include gate access codes, weight scale requirements along the route, contact-ahead requirements, loading equipment available at origin, and any route restrictions such as low bridges or weight-limited roads.
Notes From Customer is where you paste or type any instructions or information passed to you by the shipper or customer. This keeps all relevant notes in one place for reference throughout the shipment lifecycle.
Select Contract from the dropdown to attach the appropriate transport agreement to this listing. Always select a contract before posting. A listing without a contract attached lacks the legal foundation needed if a dispute arises during or after the shipment.
Step 10: Review Before Posting
Before you click Post Listing, take a moment to go through the following checklist.
Confirm the dimensions and weight are entered in the correct unit you selected at the top of the Freight Details section. Make sure the Freight Class is accurate for your commodity type. Verify the Trailer Type and Trailer Specifications match your shipment requirements. Check that the origin and destination addresses are complete with State, City, and Zip Code all filled in. Confirm the pickup date comes before the delivery date and that the time windows are realistic. Make sure Pay To Carrier is filled in as it is a required field. Verify the Order ID is entered. Confirm all relevant documents are uploaded. Check that a Contract is selected.
If you are not ready to post yet, you have two options. Click Draft Listing to save your progress and return to it later without losing any data. Use Schedule Listing if you want the listing to go live automatically at a specific future date and time, which is useful when you want to post during high-traffic hours on the load board.
Step 11: Post the Listing
Once everything looks correct, click the Post Listing button. Your freight listing will be submitted and will immediately appear in your My Listings tab under the Broker Index. From there you can monitor incoming carrier bids, assign a carrier directly, or send a Carrier Outreach email to specific carriers you want to invite to bid on the load.
What Happens Next
After posting, your freight listing enters the active load board where verified carriers can view it and submit bids or requests. All incoming bids will appear under your Bid/Request tab. Once you review and approve a carrier, the listing moves to Waiting Approval. After confirmation it moves to Dispatch, then to Pickup when the carrier collects the freight, and finally to Delivered once the shipment reaches its destination and is confirmed received.
If at any point you need to make changes to your listing after posting, you can use the Modify Listing option from your My Listings tab. If you need to reach out to multiple carriers at once, use the Carrier Outreach feature available directly from the listing row.
That is everything you need to create a freight load listing on DayDispatch. If you encounter any issues during the process, use the Chat with us button on the platform or contact your DayDispatch account manager directly.